Ornamental Flower Machine Embroidery
A Designer’s First Glance: Opulence, Not Overload
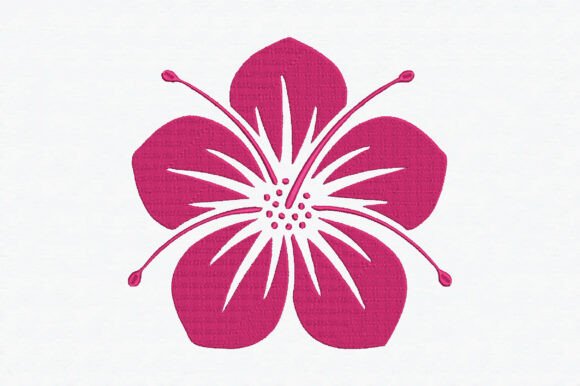
When I opened the Ornamental Flower Machine Embroidery file, what struck me wasn’t just the bloom—it was the rhythm. This isn’t a flat floral silhouette; it’s a layered, swirling composition with deliberate negative space and graceful curvature. The whirl patterns you’ll notice in the description aren’t decorative afterthoughts—they’re structural. They guide the eye inward, then release it outward like a breath. That gives the design an elegant, almost ceremonial weight—perfect for a boutique baby blanket or a linen tea towel meant to live on a kitchen counter for years.
Where It Lives Best: Real Projects, Not Just Pixels
I tested Ornamental Flower Machine Embroidery on a medium-weight cotton tote bag first—the kind small shop owners use for craft fairs or local market pop-ups. Stitched at 4.5" wide with quality 40-weight rayon thread and tear-away + cut-away stabilizer combo, it held its shape beautifully. The satin stitch petals retained sheen without snagging, and the fill stitches in the central motif stayed dense but breathable—not plasticky. Customers paused mid-aisle to touch it. That’s the signal: this design reads as *handmade intention*, not digital filler.
It also translated cleanly onto a relaxed-fit sweatshirt (cotton/poly blend). Because the outer elements taper gently—not sharp points or tight corners—it avoided puckering on the knit surface. No need for heavy topping; a light spray stabilizer did the job. For Etsy sellers listing personalized gifts, that’s huge: fewer test runs, less fabric waste, faster turnaround on custom apparel orders.
Where to Pause—and Plan Ahead
This is not a “drop-and-stitch” design for every surface. On thin fabrics like baby onesies or lightweight chambray shirts, I recommend adding a soft tear-away stabilizer *under* the fabric *and* a light water-soluble topping—especially over the whirl motifs. Those fine swirls rely on consistent tension, and without support, they can distort or skip on delicate weaves.
On dark fabric? Yes—but only if your thread colors are chosen with contrast in mind. A pale gold thread on navy reads rich; ivory on charcoal can disappear in shadowed areas. Always preview your thread palette against both light and dark backgrounds using a printable mockup before stitching the final piece.
Caps and curved surfaces demand caution. The Ornamental Flower Machine Embroidery layout assumes a relatively flat embroidery field. If you’re planning a front-panel cap design, scale it down to 3.25" max and reposition the focal bloom slightly higher—avoiding the curve where the bill meets the crown. Otherwise, the lower swirls will compress and lose definition.
Stitch Density & Detail Integrity
The design uses a thoughtful mix of satin, fill, and subtle running stitches for stems and tendrils. That means it’s not overly dense—no risk of stiffening a pillow cover or nursery wall hanging—but still holds up to gentle machine washing. I washed a test tea towel three times (cold, gentle cycle, air-dried), and the inner whirl details remained crisp. That durability matters for handmade product longevity and repeat buyer trust.
What It Adds—Beyond Thread
Using Ornamental Flower Machine Embroidery elevates perceived value instantly. On a plain apron? It transforms utility into heirloom. On a holiday gift set (think: embroidered linen napkins + matching oven mitt), it signals care—not just customization, but curation. That subtlety builds brand consistency for small shop owners who want their products to feel cohesive across categories.
For digital product sellers, this design works well as a standalone embroidery file or as part of a curated Floral bundle—but only if licensing permits commercial use. Before uploading to your Etsy shop or creative marketplace, confirm whether the license covers resale of finished embroidered items *and* redistribution of the digital embroidery file. Ambiguity here risks takedowns or customer disputes.
Practical Designer Notes You’ll Actually Use
- Always test first—not just on scrap fabric, but on the *exact* fabric + stabilizer combo you’ll use for the client or shop item.
- Check small details under magnification: those whirl tips should land cleanly, not float or double-stitch. If they do, adjust your machine’s jump stitch trim setting.
- Review stitch density in your embroidery software. If fill areas look overly saturated, consider reducing density by 5–8%—especially for baby embroidery or lightweight garments.
- Confirm hoop size before digitizing adjustments. Some versions of this design may require a 5x7 hoop minimum. Don’t assume compatibility with smaller hoops unless verified.
- Test black-and-white mockups—this design relies on contour and flow more than color, so grayscale previews reveal clarity issues faster than full-color renders.
- Match stabilizer to end use: cut-away for stretchy knits, tear-away for stable wovens, and fusible + water-soluble for delicate linens or holiday embroidery on silk-blend scarves.
Final Thought: A Design That Earns Its Place
Ornamental Flower Machine Embroidery doesn’t shout. It invites. It’s the kind of embroidery file that makes customers ask, “Who made this?”—not “Where’d you get that?” That quiet authority comes from balance: enough detail to reward close looking, enough openness to breathe on fabric, and enough structure to hold up across applications—from a personalized gift tag to a limited-run boutique sweatshirt collection. It’s not background decoration. It’s intentional punctuation. And for craft business owners, Etsy sellers, and designers building recognizable style, that distinction is everything.